
While I am off for my son's wedding, I will be sharing posts from some of my blogging buddies.
Today I am so happy to introduce you to Rachel from
Flipping The Page
Rachel is just one of the four sisters that blog at
Flipping The Page.
The sisters grew up on a farm with plenty of outside space to play but,
their true love then and now is books!
Not just reading them but, using them for craft projects.
Today Rachel shares with us a fun project
for Thanksgiving.
Thanks Rachel!
Hi, I’m Rachel (commonly known as Twin #1) from Flipping The Page. My sisters and I post book reviews, keep readers up to date on new book releases, and do book-related crafts. Come visit us and tell us what you’re reading!
Does anyone remember those days spent at the “Kids table” for family dinners? When I was a teenager, I felt like that was a punishment. I wanted so badly to sit with the adults at the big table. Now that I’m an adult, I’m starting to think the kids table was where the action was at.

Materials needed:
1. Colored paper (brown, orange, red, and yellow)
2. A book you won’t mind ripping apart (or one you pick up at a thrift store)
3. Scissors
4. Adhesive (glue, double-sided tape, it’s up to you)
5. Spray paint (optional)
6. Eyes
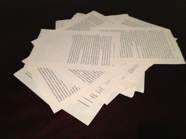
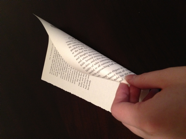
First I took apart a book. I chose one that was inexpensive and that I had already read. I ripped off the covers and then carefully tore out pages.


No comments:
Post a Comment
Thank so much for taking the time to leave a comment...your comment makes my heart smile ♥